Tutorial One:
Install and Running OpenCV 2.2
For this first tutorial I am going to
walk through the steps of installing OpenCV 2.2. I found that OpenCV 2.2 was
just as useful for the purposes of this tutorial and seems to be more
user-friendly during the installation process. If you would like to install
OpenCV 2.3 on your own it does have backwards capabilities and will work fine.
It may be obvious but this tutorial is intended installation with both Windows
7 and Visual Studio Professional 2010.
Step
One: Download and Install Microsoft Visual
Studio Professional 2010 (Its Free J).
·
Visit https://www.dreamspark.com/Product/Product.aspx?productid=4.
·
Register with
your Biola email address.
·
Download and
install Visual Studio Professional 2010.
Step
Two: Download the OpenCV 2.2 win-exe package
·
Visit http://sourceforge.net/projects/opencvlibrary/files/opencv-win/2.2/
·
Download
“OpenCV-2.2.0-win32-vs2010.exe”
Step
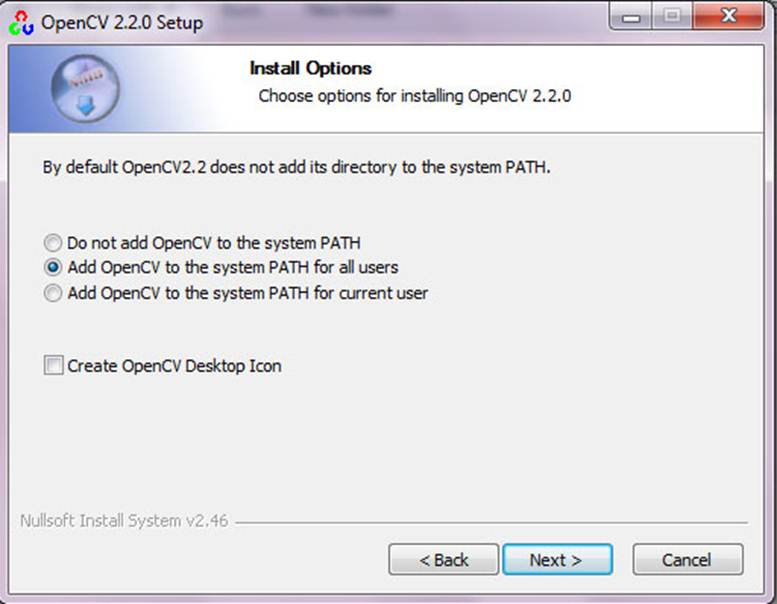
Three: Install the exe
·
Make sure you install it to the
System PATH for ALL users.
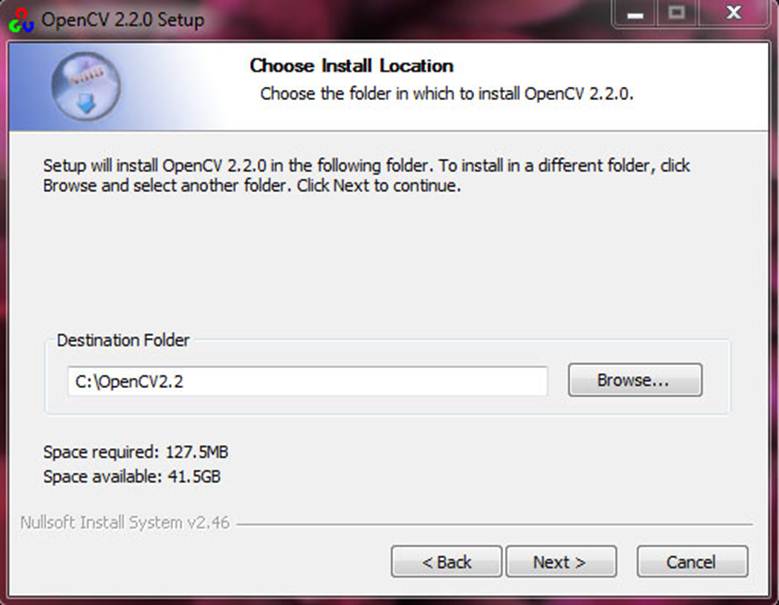
·
Install the file to a simple and
easy to find location (you will need it later). I installed it to C:\OpenCV2.2 wherever
you install it make sure you remember it!
Step
Four: Link the OpenCV library and includes into
a Visual Studio Solution.
·
Open Microsoft Visual Studio
Professional 2010
·
Create a new solution, name it
something fun J
I named mine TEMPLATE_OPENCV_2-2
·
Hit ALT+F7 to open the options
menu. Open Configuration Properties,
then VC++ Directories
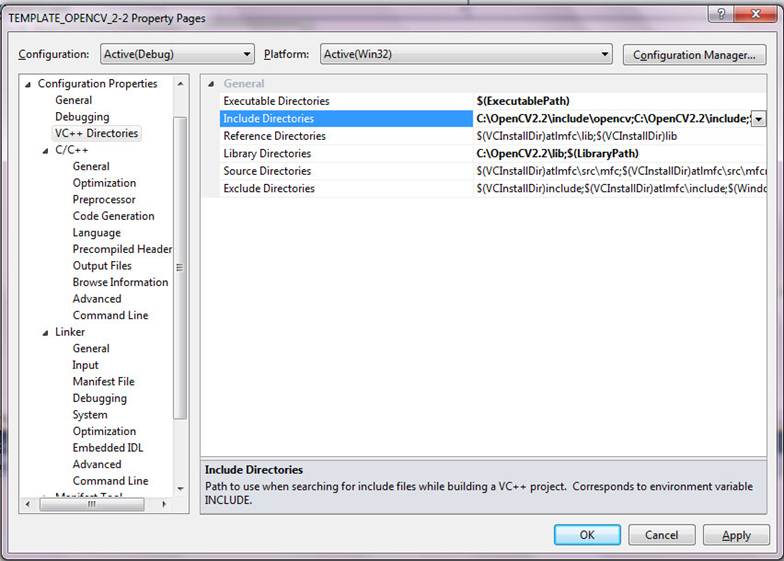
o
Under Include Directories, click edit and enter
“C:\OpenCV2.2\include\opencv” and “C:\OpenCV2.2\include” -- Replace
“C:\OpenCV2.2” with the path your files are stored.
o
Under Library Directories, click edit and enter “C:\OpenCV2.2\lib”, -- Replace “C:\OpenCV2.2” with the
path your files are stored.
·
Open Linker, then Input
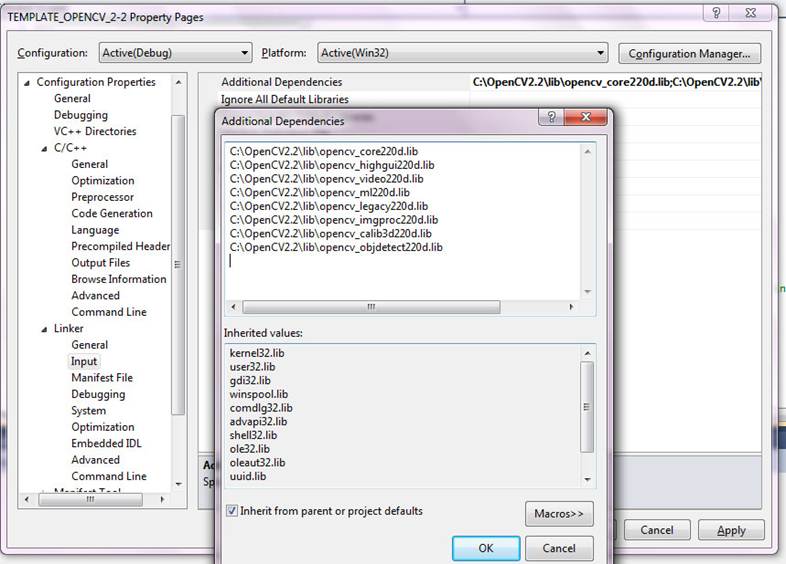
o
Under Additional
Dependencies add “C:\OpenCV2.2\lib\opencv_core220d.lib; C:\OpenCV2.2\lib\opencv_highgui220d.lib;
C:\OpenCV2.2\lib\opencv_video220d.lib; C:\OpenCV2.2\lib\opencv_ml220d.lib;
C:\OpenCV2.2\lib\opencv_legacy220d.lib;
C:\OpenCV2.2\lib\opencv_imgproc220d.lib;
C:\OpenCV2.2\lib\opencv_calib3d220d.lib; C:\OpenCV2.2\lib\opencv_objdetect220d.lib”
-- Replace “C:\OpenCV2.2” with the
path your files are stored.
o
Open C/C++, then Code Generation

o
Change Runtime Library to Multi-threaded Debug DLL (/MDd)
Step
Five: Enjoy having OpenCV 2.2 installed by
using this test program! – tutorial_one.cpp, Truck.avi
Read
the comments for help, uncomment lines 181-183 to use a webcam.
Note: This installation will only work
with this solution unless you repeat step four again in the new solution. So
for all the succeeding tutorials use the same solution, just replace the .cpp
files! Enjoy!